WP4.7 から標準で有効化された REST API の機能がどんなものなのか実験してみました
REST API は、簡単に言ってしまうと通常ブラウザを用いてサイトをアクセスしてHTMLコードを取得表示している替わりに、外部のアプリケーションから JSON等のデータ形式で同じようにサイトの投稿データ等へ簡単にアクセスするための仕組みです
WP REST API
WP4.7の紹介では下記のように説明されています
コンテンツエンドポイントは、きれいでスタンダード・ドリブンなインターフェースで WordPress サイトに対してコンピューターが読み取れる外部アクセスを提供し、プラグイン、テーマ、アプリ等を通じてサイトと相互に作用する、新しく革新的なメソッドに道を開きます
ちょっとピンとこないかもしれませんので実験をしてみましょう
準備
Xampp や Vagrant vccw 等を使ってローカル環境にテスト用の WordPress 4.7 を用意します
後は、Chrome ブラウザーと JSON データを見やすく表示してくれる拡張アドオンがあるのでそれをインストールしておきます
JSON Viewer
それでは、Rest API をブラウザを使って確認してみましょう
実験
WordPressで REST API が広く有効化されたのは wp4.7 からですが、実際には WP4.4 からの WordPress の oEmbed ブログカード埋め込み処理でも一部使われていました
WP oEmbed ブログカードで使われている REST API
これは WP4.4 から使われている REST API の機能です
例えばローカルサイト(localhost/wordpress)のWP4.7 のサンプルページで試してみます
ブラウザでアクセスするとおなじみの下記のような内容が書かれているページです
これはサンプルページです。同じ位置に固定され、(多くのテーマでは) サイトナビゲーションメニューに含まれるため、ブログ投稿とは異なります。サイト訪問者に対して自分のことを説明する自己紹介ページを作成するのが一般的です。たとえば以下のようなものになります。
はじめまして。昼間はバイク便のメッセンジャーとして働いていますが、俳優志望でもあります。これは僕のブログです。ロサンゼルスに住み、ジャックという名前のかわいい犬を飼っています。好きなものはピニャコラーダ (通り雨に濡れるのも) 。
または、このようなものでもよいでしょう。
XYZ 小道具株式会社は1971年の創立以来、高品質の小道具を皆様にご提供させていただいています。ゴッサム・シティに所在する当社では2,000名以上の社員が働いており、様々な形で地域のコミュニティへ貢献しています。
新しく WordPress ユーザーになった方は、ダッシュボードへ行ってこのページを削除し、独自のコンテンツを含む新しいページを作成してください。それでは、お楽しみください !
このページをアクセスしてブラウザからソースコードを表示させると下記のようなリンクがあるはずです。ここの href に書かれているのがまさに ブログカードを埋め込むための REST API へのリクエストコマンドとなっていてエンドポイント wp-json/oembed/1.0/embed にURLを渡して JSON 形式でデータを取得しています
<link rel="alternate" type="application/json+oembed" href="http://localhost/wordpress/wp-json/oembed/1.0/embed?url=http%3A%2F%2Flocalhost%2Fwordpress%2Fsample-page%2F" />
ここでは、ブラウザに表示させたソースコード表示からこの href 部のリンクをマウスでクリックしてみて下さい
JSON Viewer を導入してあれば、以下のようにフォーマットされた JSON データが見やすく表示されたと思います
{
version: "1.0",
provider_name: "セルティスラボ",
provider_url: "http://localhost/wordpress",
author_name: "Enomoto",
author_url: "http://localhost/wordpress/archives/author/admin/",
title: "サンプルページ",
type: "rich",
width: 600,
height: 338,
html: "<blockquote class="wp-embedded-content"><a href="http://localhost/wordpress/sample-page/">サンプルページ</a></blockquote> <script type='text/javascript'> <!--//--><![CDATA[//><!-- /** * WordPress inline HTML embed * * @since 4.4.0 * * This file cannot have ampersands in it. This is to ensure * it can be embedded in older versions of WordPress. * See https://core.trac.wordpress.org/changeset/35708. */ (function ( window, document ) { 'use strict'; var supportedBrowser = false, loaded = false; if ( document.querySelector ) { if ( window.addEventListener ) { supportedBrowser = true; } } window.wp = window.wp || {}; if ( !! window.wp.receiveEmbedMessage ) { return; } window.wp.receiveEmbedMessage = function( e ) { var data = e.data; if ( ! ( data.secret || data.message || data.value ) ) { return; } if ( /[^a-zA-Z0-9]/.test( data.secret ) ) { return; } var iframes = document.querySelectorAll( 'iframe[data-secret="' + data.secret + '"]' ), blockquotes = document.querySelectorAll( 'blockquote[data-secret="' + data.secret + '"]' ), i, source, height, sourceURL, targetURL; for ( i = 0; i < blockquotes.length; i++ ) { blockquotes[ i ].style.display = 'none'; } for ( i = 0; i < iframes.length; i++ ) { source = iframes[ i ]; if ( e.source !== source.contentWindow ) { continue; } source.removeAttribute( 'style' ); /* Resize the iframe on request. */ if ( 'height' === data.message ) { height = parseInt( data.value, 10 ); if ( height > 1000 ) { height = 1000; } else if ( ~~height < 200 ) { height = 200; } source.height = height; } /* Link to a specific URL on request. */ if ( 'link' === data.message ) { sourceURL = document.createElement( 'a' ); targetURL = document.createElement( 'a' ); sourceURL.href = source.getAttribute( 'src' ); targetURL.href = data.value; /* Only continue if link hostname matches iframe's hostname. */ if ( targetURL.host === sourceURL.host ) { if ( document.activeElement === source ) { window.top.location.href = data.value; } } } } }; function onLoad() { if ( loaded ) { return; } loaded = true; var isIE10 = -1 !== navigator.appVersion.indexOf( 'MSIE 10' ), isIE11 = !!navigator.userAgent.match( /Trident.*rv:11\./ ), iframes = document.querySelectorAll( 'iframe.wp-embedded-content' ), iframeClone, i, source, secret; for ( i = 0; i < iframes.length; i++ ) { source = iframes[ i ]; if ( ! source.getAttribute( 'data-secret' ) ) { /* Add secret to iframe */ secret = Math.random().toString( 36 ).substr( 2, 10 ); source.src += '#?secret=' + secret; source.setAttribute( 'data-secret', secret ); } /* Remove security attribute from iframes in IE10 and IE11. */ if ( ( isIE10 || isIE11 ) ) { iframeClone = source.cloneNode( true ); iframeClone.removeAttribute( 'security' ); source.parentNode.replaceChild( iframeClone, source ); } } } if ( supportedBrowser ) { window.addEventListener( 'message', window.wp.receiveEmbedMessage, false ); document.addEventListener( 'DOMContentLoaded', onLoad, false ); window.addEventListener( 'load', onLoad, false ); } })( window, document ); //--><!]]> </script><iframe sandbox="allow-scripts" security="restricted" src="http://localhost/wordpress/sample-page/embed/" width="600" height="338" title="“サンプルページ” — セルティスラボ" frameborder="0" marginwidth="0" marginheight="0" scrolling="no" class="wp-embedded-content"></iframe>"
}
こんな感じでサイトのデータを JSON 形式で取れるということを知っておいてください
ちなみに WP oEmbed ブログカードを埋め込んだ場合は、ここで取得した html の blockquote や Javascript、iframe コードが保存されて、ブログカードを埋め込まれたページがアクセスされたときにブログカード表示データが元サイトから iframe で表示されます
WP4.7 からの REST API
WP4.7からは REST API で様々なデータを取得できるようになりました
投稿データやユーザーデータ等。
詳細は下記ページを参照してください
REST API Handbook | WordPress Developer Resources
それでは、早速実験してみましょう
テスト用にいくつか投稿データを作ってみて下さい
※テーマユニットテスト用のデータを読み込むのが楽ちんです
テストデータを作成したらブラウザから下記URLへアクセスしてみて下さい
- http://localhost/wordpress/wp-json/wp/v2/posts/?per_page=100
※サイト名部分の localhost/wordpress はご自身の環境に合わせて下さい
下記のような投稿データが一気に取得できたはずです
{
id: 2400,
date: "2013-01-10T20:15:40",
date_gmt: "2013-01-11T03:15:40",
guid: {
rendered: "http://wptest.io/demo/?p=903"
},
modified: "2013-01-10T20:15:40",
modified_gmt: "2013-01-11T03:15:40",
slug: "markup-image-alignment-2",
type: "post",
link: "http://localhost/wordpress/archives/20130110/markup-image-alignment-2/",
title: {
rendered: "マークアップ: 画像の配置"
},
content: {
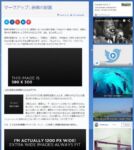
rendered: "<p>画像の配置テストへようこそ ! 画像をいろいろな位置に配置してみるのに一番良い方法は、言葉の海の中に画像をそっとうずめてみることです。さあ、はじめましょう。</p> <p>画像の配置では、ユーザーが「指定なし」「右寄せ」「左寄せ」「中央揃え」の中から自分の好きなものを選べるようにする必要があります。さらに、「サムネイル」「中サイズ」「大サイズ」「フルサイズ」という選択肢の中から大きさを選べるようにするべきです。</p> <p style="text-align: center;"><img class="size-full wp-image-906 aligncenter" title="画像配置 580x300" alt="画像配置 580x300" src="http://wpthemetestdata.files.wordpress.com/2013/03/image-alignment-580x300.jpg" width="580" height="300" /></p> <p>上記の画像は<strong>中央寄せ</strong>になるはずです。</p> <p><strong><img class="size-full wp-image-904 alignleft" title="画像配置 150x150" alt="画像配置 150x150" src="http://wpthemetestdata.files.wordpress.com/2013/03/image-alignment-150x150.jpg" width="150" height="150" /></strong>このパラグラフの残り画像を左寄せしたとき、文章が150ピクセルの画像の周りを囲むようになるかどうか見るためのものです。<strong></strong></p> <p>ご覧のとおり、画像の上・下・右にスペースが空いている事がわかると思います。テキストは画像にこっそりと忍びよってはいません、忍び寄ることは良くない事です。画像だって十分に呼吸ができるスペースが必要なのです。画像が文章にイライラさせられることなく役割を果たせるようにしてあげてください。次の文章では、テキストが画像の右から下へとシームレスに途切れることなく続いている事がわかりますね。これで完了です !</p> <p>次は、<strong>とても大きな画像</strong>のテストです。そして、この画像には<strong>配置の指定がありません</strong>。</p> <p><img class="alignnone wp-image-907" title="画像配置 1200x400" alt="画像配置 1200x400" src="http://wpthemetestdata.files.wordpress.com/2013/03/image-alignment-1200x4002.jpg" width="1200" height="400" /></p> <p>上記の画像は1200ピクセルもありますが、コンテンツエリアからはみ出る事はなく収まっています。</p> <p><img class="size-full wp-image-905 alignright" title="画像配置 300x200" alt="画像配置 300x200" src="http://wpthemetestdata.files.wordpress.com/2013/03/image-alignment-300x200.jpg" width="300" height="200" /></p> <p>そして今後は右寄せに移りたいと思います。また今度も、画像の上、下、左に十分な余白があると思います。ほら、あっちにいる彼を見てください ! 右側の方にいるあの画像 ! 左寄せ画像がなんて言うかなんてどうでもいいんです、美しい配置ですよ。他の人の意見なんて気にしないでいいんです。</p> <p>そしてこのへんでテキストが右寄せの画像の下に回り込んで、ちょうど良い具合に収まっているのが分かると思います。ひきつづきちょうど良い具合にスペースが残されていて、すべてがきれいに表示されているべきです。そうです…。右画像に回り込むのって気持ちいいですね。</p> <p>さて、これで終わりと思ったかもしれませんが、これからキャプションのテストに入ります !</p> <figure id="attachment_906" style="width: 580px" class="wp-caption aligncenter"><img class="size-full wp-image-906 " title="画像配置 580x300" alt="画像配置 580x300" src="http://wpthemetestdata.files.wordpress.com/2013/03/image-alignment-580x300.jpg" width="580" height="300" /><figcaption class="wp-caption-text">580×300 画像の<a title="画像設定" href="http://en.support.wordpress.com/images/image-settings/">キャプション</a>例。</figcaption></figure> <p>上記の画像は<strong>中央寄せ</strong>になるはずです。キャプションにはリンクが含まれていますが、おかしな表示になっていないか確認しましょう。</p> <figure id="attachment_904" style="width: 150px" class="wp-caption alignleft"><img class="size-full wp-image-904 " title="画像配置 150x150" alt="画像配置 150x150" src="http://wpthemetestdata.files.wordpress.com/2013/03/image-alignment-150x150.jpg" width="150" height="150" /><figcaption class="wp-caption-text">ちょっとしたキャプション</figcaption></figure> <p>このパラグラフの残りの部分は、150×150 サイズの<strong>左寄せ</strong>画像の回り込みをテストするためのつなぎです。 </p> <p>ご覧の通り、画像の上・下・右にスペースが必要です。テキストは画像にこっそりと忍びよってはいません、忍び寄ることは良くない事です。画像だって十分に呼吸ができるスペースが必要なのです。画像が文章にイライラさせられることなく役割を果たせるようにしてあげてください。次の文章では、テキストが画像の右から下へとシームレスに途切れることなく続いている事がわかりますね。これで完了です !</p> <p>それでは、<strong>とても大きな画像</strong>のテストです。そして、この画像にも<strong>配置の指定はありません</strong>。</p> <figure id="attachment_907" style="width: 1200px" class="wp-caption alignnone"><img class=" wp-image-907" title="画像配置 1200x400" alt="画像配置 1200x400" src="http://wpthemetestdata.files.wordpress.com/2013/03/image-alignment-1200x4002.jpg" width="1200" height="400" /><figcaption class="wp-caption-text">とても大きな画像のコメント</figcaption></figure> <p>上記の画像は1200ピクセル幅ですが、コンテンツエリアからはみ出すべきではありません。コンテンツのフローを視覚的に邪魔しないかたちで、指定のエリア内に収まっている必要があります。</p> <figure id="attachment_905" style="width: 300px" class="wp-caption alignright"><img class="size-full wp-image-905 " title="画像配置 300x200" alt="画像配置 300x200" src="http://wpthemetestdata.files.wordpress.com/2013/03/image-alignment-300x200.jpg" width="300" height="200" /><figcaption class="wp-caption-text">右側いるのほ良い気分です。</figcaption></figure> <p>そして今後は<strong>右寄せ</strong>画像に移りたいと思います。また今度も、画像の上、下、左に十分な余白があると思います。ほら、あっちにいる彼を見てください ! 右側の方にいるあの画像 ! 左寄せ画像がなんて言うかなんてどうでもいいんです、美しい配置ですよ。他の人の意見なんて気にしないでいいんです</p> <p>そしてこのへんでテキストが右寄せの画像の下に回り込んで、ちょうど良い具合に収まっているのが分かると思います。ひきつづきちょうど良い具合にスペースが残されていて、すべてがきれいに表示されているべきです。そうです…。右画像に回り込むのって気持ちいいですね。</p> <p>それでは、これで終わりです。画像配置のテスト、お疲れ様でした !</p> ",
protected: false
},
excerpt: {
rendered: "<p>画像の配置テストへようこそ ! 画像をいろいろな位置に配置してみるのに一番良い方法は、言葉の海の中に画像をそっとうずめてみることです。さあ、はじめましょう。 画像の配置では、ユーザーが「指定なし」「右寄せ」「左寄せ」「中央揃え」の中から自分の好きなものを選べるようにする必要があり…</p> <div class="read-more"><a href="http://localhost/wordpress/archives/20130110/markup-image-alignment-2/">続きを読む</a></div> ",
protected: false
},
author: 11,
featured_media: 1023,
comment_status: "closed",
ping_status: "closed",
sticky: false,
template: "",
format: "standard",
meta: [ ],
categories: [
328
],
tags: [
209,
213,
218,
219,
236,
246
],
_links: {
self: [
{
href: "http://localhost/wordpress/wp-json/wp/v2/posts/2400"
}
],
collection: [
{
href: "http://localhost/wordpress/wp-json/wp/v2/posts"
}
],
about: [
{
href: "http://localhost/wordpress/wp-json/wp/v2/types/post"
}
],
author: [
{
embeddable: true,
href: "http://localhost/wordpress/wp-json/wp/v2/users/11"
}
],
replies: [
{
embeddable: true,
href: "http://localhost/wordpress/wp-json/wp/v2/comments?post=2400"
}
],
version-history: [
{
href: "http://localhost/wordpress/wp-json/wp/v2/posts/2400/revisions"
}
],
wp:featuredmedia: [
{
embeddable: true,
href: "http://localhost/wordpress/wp-json/wp/v2/media/1023"
}
],
wp:attachment: [
{
href: "http://localhost/wordpress/wp-json/wp/v2/media?parent=2400"
}
],
wp:term: [
{
taxonomy: "category",
embeddable: true,
href: "http://localhost/wordpress/wp-json/wp/v2/categories?post=2400"
},
{
taxonomy: "post_tag",
embeddable: true,
href: "http://localhost/wordpress/wp-json/wp/v2/tags?post=2400"
}
],
curies: [
{
name: "wp",
href: "https://api.w.org/{rel}",
templated: true
}
]
}
},
次はユーザーデータを取得してみて下さい
- http://localhost/wordpress/wp-json/wp/v2/users
[
{
id: 5,
name: "Cais",
url: "",
description: "",
link: "http://localhost/wordpress/archives/author/cais/",
slug: "cais",
avatar_urls: {
24: "http://1.gravatar.com/avatar/142b3fafbea1337786fba846f1e9509d?s=24&d=retro&r=g",
48: "http://1.gravatar.com/avatar/142b3fafbea1337786fba846f1e9509d?s=48&d=retro&r=g",
96: "http://1.gravatar.com/avatar/142b3fafbea1337786fba846f1e9509d?s=96&d=retro&r=g"
},
meta: [ ],
_links: {
self: [
{
href: "http://localhost/wordpress/wp-json/wp/v2/users/5"
}
],
collection: [
{
href: "http://localhost/wordpress/wp-json/wp/v2/users"
}
]
}
},
{
id: 4,
name: "Chip Bennett",
url: "",
description: "",
link: "http://localhost/wordpress/archives/author/chip-bennett/",
slug: "chip-bennett",
avatar_urls: {
24: "http://1.gravatar.com/avatar/12529e17f778f625c520bc493ba02616?s=24&d=retro&r=g",
48: "http://1.gravatar.com/avatar/12529e17f778f625c520bc493ba02616?s=48&d=retro&r=g",
96: "http://1.gravatar.com/avatar/12529e17f778f625c520bc493ba02616?s=96&d=retro&r=g"
},
meta: [ ],
_links: {
self: [
{
href: "http://localhost/wordpress/wp-json/wp/v2/users/4"
}
],
collection: [
{
href: "http://localhost/wordpress/wp-json/wp/v2/users"
}
]
}
},
{
id: 1,
name: "Enomoto",
url: "https://celtislab.net",
description: "このテストサイトの管理人です",
link: "http://localhost/wordpress/archives/author/admin/",
slug: "admin",
avatar_urls: {
24: "http://0.gravatar.com/avatar/c5917fa153b48c57f0a36b95bc2e8218?s=24&d=retro&r=g",
48: "http://0.gravatar.com/avatar/c5917fa153b48c57f0a36b95bc2e8218?s=48&d=retro&r=g",
96: "http://0.gravatar.com/avatar/c5917fa153b48c57f0a36b95bc2e8218?s=96&d=retro&r=g"
},
meta: [ ],
_links: {
self: [
{
href: "http://localhost/wordpress/wp-json/wp/v2/users/1"
}
],
collection: [
{
href: "http://localhost/wordpress/wp-json/wp/v2/users"
}
]
}
},
ちょっとびっくり (*_*;
メールアドレスやパスワードのデータまでは含まれていないようですが、slug が含まれているユーザー一覧データが誰にでも簡単に取れてしまうのはまずい気がします
データ取得は誰にでも出来てしまいましたが、投稿の編集を行う場合は当然ですが認証を行う必要があります
nonce による認証や OAuth を使うようです(確認していません m(__)m)
WordPress REST API – OAuth 1.0a Server
この辺は、まだきちんと理解していないので今回はスルーします (^_^;)
ただ、今回のテストで WP4.7 のサイトに対しては、誰でも簡単に投稿データやユーザーデータが取れてしまうことがわかりました
REST API は便利ですが、望まない場合も多いと思います。そこで REST API を制限する方法を次に紹介します
WP4.7 REST API を制限する
WP4.7 の REST API を禁止する方法は既に誰かが公開していると思いググるといくつか見つかりました
WordPress4.7.0以降で「REST API」を無効にする方法が変わっていたので試しました
What you may not know about the WP REST API – Maddison Designs
ただ、REST API を全面的に制限するのではなく、データ内容ごとに認証ナシや OAuth認証が必要等きめ細かく対応できれば良いのですが、今回はデータ取得にクッキー認証によるユーザー権限の判定と WP oEmbed ブログカードのみを例外的に扱う機能をこれらの記事を参考に実装してみました
Celtispack Ver2.3.0 に追加した機能ですが、参考コードとして紹介します

class Celtispack_restapi_filter {

    public $option = null;

    function __construct() {
        $this->option = Celtispack::get_options();
        //add_filter( 'rest_authentication_errors', array($this, 'restapi_filter') );
        add_filter( 'rest_pre_dispatch', array($this, 'restapi_filter'), 10, 3 );
    }

    function restapi_filter( $result, $server, $request ) {

	$method = $request->get_method();
	$path   = $request->get_route();
        if($method == 'GET'){
	    $match = preg_match( '#^/oembed/.+/embed$#i', $path, $args );
            if($match){ //embed card
                if(!empty($this->option['restapi-embed'])){
                    return $result;
                }
            }
            if(empty($this->option['restapi-role'])){
                return $result;
            } else {
                $role = $this->option['restapi-role'];
                if($role !== 'do_not_allow'){
                    global $current_user;
                    $current_user = null; //再取得するためのクリア
                    if( is_user_logged_in() &&  current_user_can( $role ) ) {
                        return $result;
                    }
                }
            }
        }
        return new WP_Error( 'rest_do_not_allow', __( 'REST API へのアクセス権限がありません', 'celtispack' ), array( 'status' => rest_authorization_required_code() ) );
    }

    public static function init() {
        $celtispack_restapi_filter = new Celtispack_restapi_filter();
    }
}
if ( version_compare( $GLOBALS['wp_version'], '4.7', '>=' ) ){
    add_action( 'init', array( 'Celtispack_restapi_filter', 'init' ) );
}
※設定オプションから有効化するユーザー権限やブログカード機能を例外的に扱うかを指定できるようになっています。その為、フィルターフックは rest_authentication_errors (こちらの使用が通常は推奨されている)ではなく rest_pre_dispatch をつかいエンドポイントの判定等を行っています
※Celtispack Ver2.5 で Rest API から指定プラグイン( contact-form-7、jetpack等)のエンドポイントをREST API 無効化対象から除外に出来るように修正しました。変更点は最新のソースコードを参照してください。
まとめ
将来的には、ブラウザ以外のアプリケーション等から使われる機能なのでブログの範囲を超えたこCMSとして利用するには必須の機能なのかもしれませんが、現状で WordPressをブログとしてしか使用していない場合はまだ使わないという方も多数おられると思います
認証なしで取得できるデータの範囲を設定出来たり、簡単で確実な認証の方法が使われるようになってからでも遅くないのかなという気もします
ということで何も考えずに WP4.7 に更新してしまうのはちょっと待って、少なくとも REST API のことを調べてから判断してください
デフォルトで有効になっていますので、この機能が不要な方はプラグインを導入したり、ご自身で制限するコードを書いたりして機能を止めておくことが出来ます

